
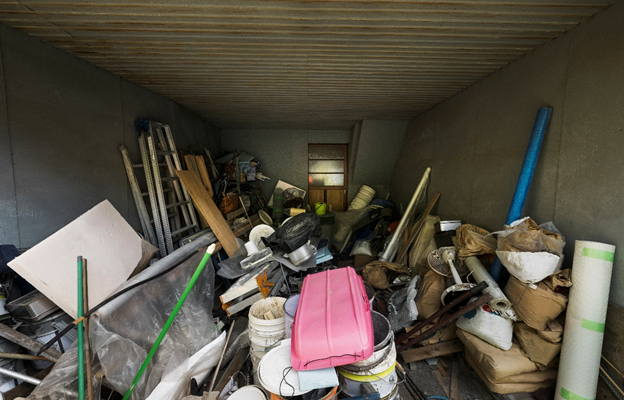
Flipping a house means juggling dozens of moving parts—permits, contractors, lenders, even the weather. One piece you can lock down early is the dumpster (see this link for more info). When you know the size you need, your job-site cleanup stays painless, schedules stay tight, and neighbors stay happy. Follow the steps below and you’ll order the right roll-off dumpster rental the first time, instead of paying for do-overs.
Measure Your Project Footprint
Start with a quick walkthrough of the property while it’s still intact. Carry a tape measure or laser tool and record each room’s length and width. Multiply those figures for square footage, then decide whether that space is getting a cosmetic refresh or a full-gut demolition.
- Light touch: Paint, trim, and new flooring usually create about 0.12 cubic yards of debris per square foot.
- Full gut: Removing sheetrock, insulation, cabinets, and fixtures can push waste to 0.25 cubic yards per square foot.
Add every room’s total, then tack on 10 percent for the odd closets, soffits, and half-rotten porch boards that show up once you start swinging the hammer. That cushion keeps you from scrambling for a second container halfway through the renovation trash management phase. By measuring now, you also ensure the bin will sit safely inside your driveway without blocking traffic or getting dinged by delivery trucks. Visit https://www.angi.com/articles/how-to-calculate-demolition.htm for additional details.
Weight Limits Explained
Volume tells you how much space your construction debris takes up, but weight determines what the hauler will lift. Every dumpster size comes with a built-in tonnage allowance. A 10-yard can often handle up to two tons; a 20-yard climbs to three; 30- and 40-yard cans can hold five or six tons before extra charges kick in.
Check your scope: plaster lath, roofing shingles, brick, and concrete weigh far more than hollow cabinet carcasses or carpet pad. If heavy materials make up more than one-third of your pile, move up one container size or ask the dispatcher for a “heavy debris” bin designed for masonry. That swap costs a little more up front, but it beats surprise overweight penalties that can double your disposal bill. Remember, construction debris disposal is cheaper when you match the right can to the right load.
Four Common Dumpster Sizes
You’ve penciled out the cubic yards and estimated the weight. Now match those numbers to the four roll-off sizes most haulers keep in stock. Read the descriptions first; the bullet list afterward will help you choose with confidence.
Before you scan the specs, measure your driveway width—most residential drives are about eight feet across. Make sure there’s room to swing those big steel doors without clipping a fence or mailbox.
- 10-yard (≈ 14 ft L × 7.5 ft W × 3.5 ft H)
Think powder-room demo, shed clean-out, or hauling away a single layer of old shingles. You’ll fit roughly three pickup-truck loads of construction waste removal while leaving space for workers to park. - 20-yard
The rookie flipper’s best friend. It swallows a full kitchen tear-out, 40 squares of roofing, or 400 sq ft of hardwood without towering over the driveway. Most cities require no extra permits for placement. - 30-yard
Choose this when your plan includes multiple rooms or partial wall removal. Its taller sides keep drywall dust and splintered studs contained, which speeds your job site cleanup at the end of each day. - 40-yard
Made for whole-house guts, major additions, or mixed interior-exterior renovations. You’ll need clear overhead room for delivery because the truck raises the bed high to slide the container off.
For readers in North Idaho, Debris Removal Coeur d’Alene will gladly walk you through local tipping fees and coordinate permits if the bin must sit in the street.
When One Bin Isn’t Enough
Even the perfect-sized can may fill up faster than expected when demolition happens in waves. Instead of ordering an enormous container to sit idle for weeks, talk to your hauler about swap-outs. They’ll yank the full bin and drop a fresh one the same day, keeping your renovation momentum—and morale—high.
If your flip involves both interior gutting and exterior landscaping, schedule two smaller pickups rather than one monster dump run. You’ll separate clean green waste from drywall, which often lowers tipping costs. Plus, breaking the timeline into phases helps neighbors see steady progress rather than a stationary heap of renovation debris.
Avoiding Overflow Fees
You’ve measured, planned, and ordered. Now protect your budget by making sure nothing sticks above the bin’s top rail when pickup day arrives. Drivers must tarp every load; if they can’t, they’ll leave the container in place and charge a second visit. Read these quick reminders before the crew starts pitching trash:
- Break it down. Snap long studs, flatten boxes, and nest broken tile into buckets to remove air pockets.
- Load evenly. Spread heavy chunks across the floor of the bin so the truck’s hoist lifts smoothly. Uneven weight can warp the frame or overload one axle.
- Watch the blacklist. Tires, paint, solvents, and appliances with refrigerant cost extra or force a reload. Post a “no-go” list near the bin.
- Call ahead. Arrange pickup once debris hits the fill line; many haulers need only 24 hours’ notice. Delays add daily rental fees.
- Sweep and stage. A quick broom at quitting time keeps nails out of car tires and lets you eyeball how many cubic yards remain for tomorrow’s tear-out.
Practice these habits and you’ll breeze through disposal without paying a single overflow or contamination fee. That money stays in your pocket—and goes straight into your next flip.
Ordering the right dumpster isn’t glamorous, but it’s one of the smartest moves a first-time investor can make. By measuring the job, respecting weight limits, choosing the proper size, and planning for swap-outs or overflow, you keep renovation trash management smooth from Day 1 to final sweep-up. Stick to this roadmap and your construction debris removal services will feel like just another tool in your belt rather than a looming headache. Happy renovating—and here’s to a clean, profitable finish!


Comments