
Home remodeling projects can transform your living space-but they also bring dust, debris, moisture, and heavy traffic that can easily damage floors, walls, countertops, and fixtures.
Without proper protection, even a short renovation can result in costly repairs or permanent surface damage. A proactive strategy helps maintain your home’s condition and prevents damage throughout the renovation process.
Here’s how to effectively protect your home surfaces during remodeling projects.
1. Start with a Protection Plan
Before any work begins, identify all vulnerable surfaces in the renovation area and adjacent spaces. High-risk areas typically include hardwood floors, marble tiles, glass windows, cabinetry, and countertops. Create a clear protection plan outlining what materials to use and how each surface will be covered.
It’s also important to consider traffic flow. Workers moving in and out can track dirt and debris across the home, so plan designated walkways and entry points to minimize exposure.
2. Use the Right Protective Materials
Not all protective solutions offer the same level of performance. Choosing the right materials is critical:
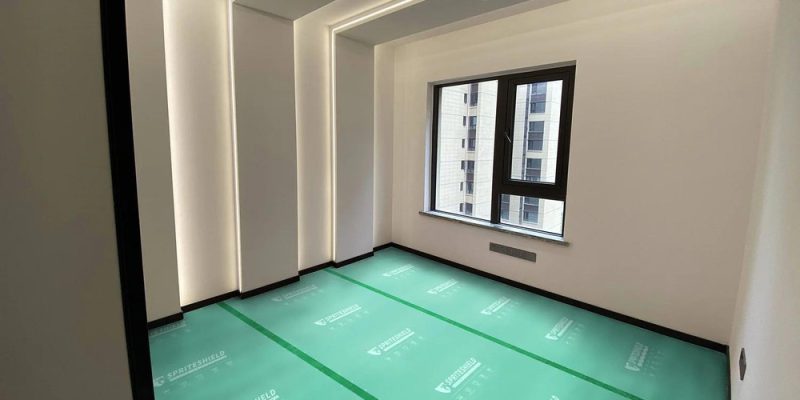
- Temporary floor protection films: Ideal for hardwood, tile, and vinyl floors. These floor protective films provide reliable protection against scratches, spills, and dust, while allowing clean, residue-free removal.
- Corrugated boards or protection sheets: Provide impact resistance in high-traffic areas.
- Masking tapes for windows and glass: Masking tapes prevent paint splashes, dust buildup, and scratches.
- Protective coverings for countertops and cabinets: Use foam sheets or non-abrasive covers to avoid dents and surface damage.
Make sure all materials are suitable for the specific surface being protected. For example, breathable protection is essential for wood floors to prevent moisture buildup.
3. Control Dust and Debris
Dust remains one of the most significant challenges encountered during remodeling projects. Fine particles can settle on every surface, leading to scratches and long-term wear.
To manage dust effectively:
- Seal off work areas using plastic barriers or zip walls.
- Seal vents and doorways to effectively contain dust and limit its spread.
- Use dust control systems such as air scrubbers or vacuum attachments on tools.
Regular cleaning is equally important. Sweep, vacuum, or use a microfiber mop daily to prevent accumulation that could damage surfaces.
4. Protect Against Moisture and Spills
Water, paint, adhesives, and chemicals can quickly damage surfaces if not properly managed. Hardwood floors are especially vulnerable to moisture exposure.
Use waterproof surface protective films or layered coverings in areas where liquids are likely to be used. Immediately clean up any spills and inspect protective materials regularly to ensure they remain intact and effective.
5. Secure and Maintain Protective Coverings
Simply placing protective materials is not enough-they must be properly installed and maintained throughout the project.
- Secure coverings with appropriate tapes that won’t leave residue.
- Avoid loose edges that could cause tripping hazards or allow debris underneath.
- Inspect coverings frequently and replace any damaged sections promptly.
Damage prevention is not a one-time task; it requires continuous monitoring from start to finish.
6. Limit Impact and Heavy Load Damage
Construction tools, ladders, and heavy equipment can easily dent or crack surfaces. To prevent this:
- Use thick protective boards in areas where heavy items will be placed.
- Add padding under ladders or scaffolding.
- Avoid dragging tools or materials across floors.
Implementing these measures greatly lowers the likelihood of impact damage.
7. Conduct Regular Inspections
Frequent inspections help identify early signs of damage or protection failure. Check for:
- Tears or lifting in protective films
- Accumulated dust or debris under coverings
- Moisture trapped beneath materials
Addressing these issues early prevents minor problems from escalating into costly repairs.
8. Final Cleaning and Safe Removal
Once the remodeling work is complete, carefully remove all protective materials. Do this slowly to avoid damaging surfaces, especially if adhesives were used.
If any residue remains, use manufacturer-recommended cleaning solutions that are safe for the specific surface. Complete the renovation by performing a thorough cleanup to restore the space to its pre-project state.


Comments